
Driveway Drain Types: Choose the Right Fix for the Water
Compare channel drains, catch basins, French drains and culverts, then specify the outlet, capacity and installation details your driveway needs.
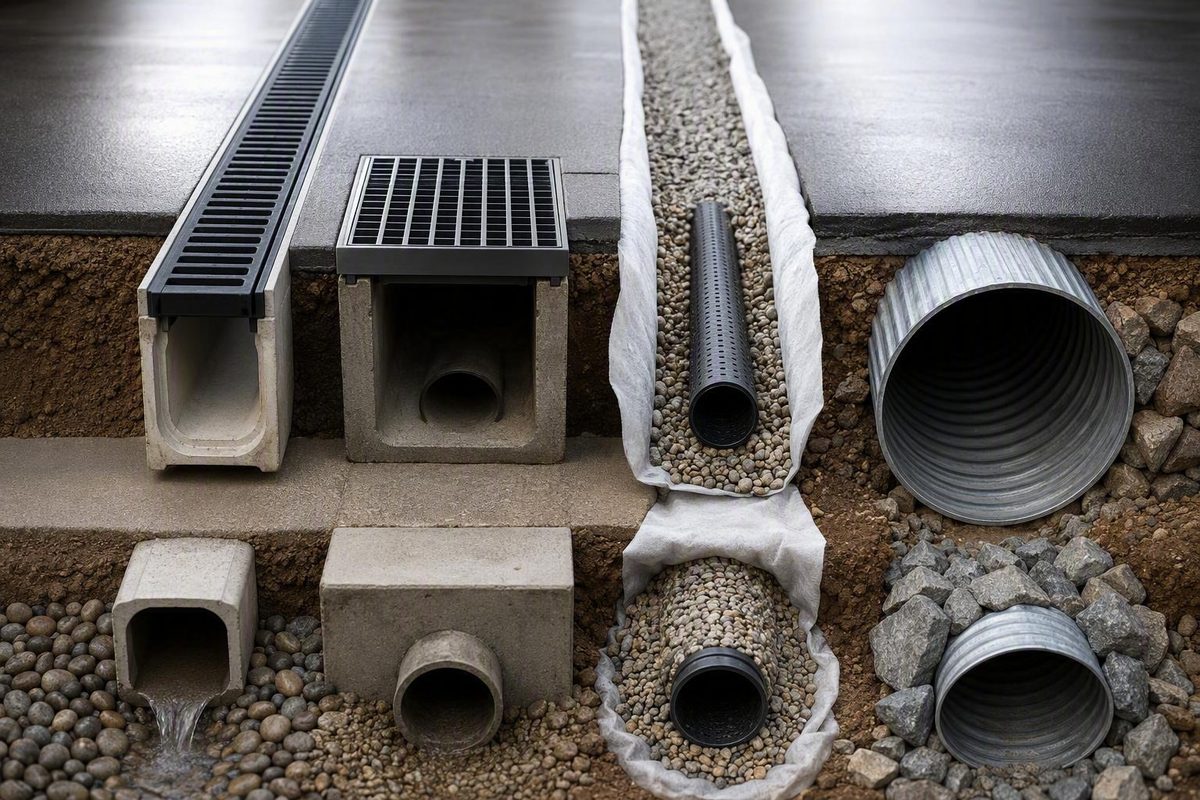
A driveway drain should intercept water before it reaches a garage, crosses a walking route or erodes the driveway edge—and then carry that water to a workable outlet. The inlet alone is not the solution. A grate set at the wrong elevation, an undersized pipe or a discharge point that stays underwater can leave you with the same puddle after an expensive installation.
For most paved driveways with sheet flow, a channel drain is the starting point. A catch basin is better for a defined low spot, while a French drain addresses water moving through wet soil. A driveway culvert has a different job: carrying ditch or swale flow beneath the entrance.
Match the drain to the water problem
| What you observe | Likely starting point | Why it fits |
|---|---|---|
| Water flows across the full driveway toward the garage | Channel or trench drain | Its long grate intercepts sheet flow across a broad line |
| One isolated low spot collects runoff | Catch basin and solid outlet pipe | A point inlet fits water already converging in one place |
| The gravel shoulder or adjacent lawn stays saturated after rain | French drain, swale or regrading | The issue may be subsurface water or slow drainage rather than sheet flow on pavement |
| A roadside ditch must continue beneath the driveway entrance | Culvert | It preserves the ditch’s flow path under the crossing |
| Runoff is manageable and the soil drains well | Rain garden, dry well or permeable pavement | These options can retain and infiltrate water instead of merely relocating it |
A channel drain is a continuous grated inlet, whereas a catch basin is a collection box at a point. The Northern Virginia Soil and Water Conservation District describes a catch basin as a box placed at a low spot and connected to a buried pipe that discharges to a suitable outlet. It also distinguishes a French drain as a perforated pipe surrounded by gravel and fabric (Fairfax County). If that is the appropriate system, see how to choose French-drain gravel.
Do not use a French drain as a substitute for a surface inlet where fast runoff crosses pavement. Water first has to enter the stone and perforated pipe, while a channel grate is designed to intercept it at the surface.
Solve the outlet before buying the inlet
Trace the complete route on a sketch:
- Catchment: driveway area plus any roof, walkway, uphill yard or road runoff entering it.
- Inlet: channel drain, catch basin or another interception point.
- Conveyance: solid pipe, swale or approved storm connection.
- Outlet: a lawful location with enough fall and capacity to receive the flow.
- Overflow: where water will travel if the inlet clogs or a storm exceeds the design capacity.
Redirecting runoff to an unsuitable area only moves the problem downhill and can affect neighboring properties, according to the conservation district’s homeowner guidance (Fairfax County). Check local rules before connecting to a storm system, modifying a roadside ditch or working in a public right-of-way.
A dry well or rain garden is not an automatic answer. Poorly infiltrating soil, high groundwater and shallow bedrock can make infiltration unsuitable; an underdrain may be necessary. These features also should not be placed beside a foundation (Fairfax County). As another option, permeable asphalt, pervious concrete, interlocking pavers and grid pavers can reduce runoff by allowing rain and snowmelt into underlying soil and gravel layers (US EPA). That is a pavement-and-base design decision, not a quick drain retrofit.
Where a channel drain should go
Place the channel across the runoff path at the actual low line—not simply where installation is easiest. For a driveway sloping toward a garage, that commonly means a line across the full paved width before the threshold, with the surrounding pavement graded into the grate.
NDS’s installation guidance calls for locating a channel at the low point, perpendicular to flow and sloped toward its outlet. It recommends a 1% to 2% channel slope (NDS). Follow the selected system’s instructions, however: some channels have built-in fall, while constant-depth products depend on site grade.
The finished paving matters as much as the drain. Avoid creating narrow birdbaths beside the grate, and do not leave an asphalt lip that blocks water. If runoff can bypass either end, extend the drain or reshape the approach so the full flow reaches the inlet.
Specify capacity and traffic load separately
Do not size a driveway drain from channel width alone. Ask the designer or contractor to document:
- contributing drainage area;
- locally required design storm or rainfall intensity;
- grate inlet capacity;
- channel capacity and slope;
- outlet-pipe diameter, slope and material;
- outlet capacity and overflow route;
- anticipated vehicles, including delivery or service trucks.
Grate and channel capacity are separate limits. For example, one NDS channel lists channel capacity at a 1% slope and a range of grate inflow rates per linear foot, depending on the grate (NDS). That product data is not a universal driveway size; it illustrates why a quote should identify the exact channel, grate, slope and outlet rather than merely promise a “4-inch drain.”
Traffic rating is separate again. ACO’s selection guidance lists anticipated vehicle traffic and the associated load class among the factors for choosing a grate (ACO). Get the installed system’s rating in writing. A pedestrian grate or loosely supported channel can be a poor choice even if its hydraulic capacity looks adequate.
Installation details that belong in the quote
A useful driveway-drain quote should identify:
- exact channel and grate model;
- drain location and finished elevations;
- saw-cutting, excavation and disposal;
- bedding or concrete encasement required by the manufacturer;
- transitions between concrete, asphalt or pavers and the drain;
- outlet pipe, fittings, cleanouts and discharge location;
- pavement restoration;
- permits and utility locating;
- warranty and maintenance access.
For its vehicle-crossing installations, NDS calls for full support with a 4-inch concrete base and for the grate to be recessed 1/8 to 1/4 inch from the adjacent surface (NDS). Treat those dimensions as instructions for the referenced systems, not a substitute for the installation detail supplied with your chosen product.
Installation is a good time to correct failed grading or base material beside the drain. If the surrounding pavement is settling, a new channel may settle with it unless the weak support or washout is repaired first. Persistent depressions, expanding voids or sudden sinking call for diagnosis before another surface patch; review these driveway sinkhole warning signs.
Maintenance and the final buying decision
Choose a grate that can be removed without demolishing the pavement, and make the pipe or catch basin accessible for cleaning. Clear leaves, gravel and sediment before forecast heavy rain and after storms that carry debris. Inspect for rocking grates, broken concrete shoulders, standing water in an unintended low spot and erosion at the outlet.
The strongest proposal is not necessarily the one with the largest grate. It is the one that shows the water path from catchment to overflow, names a vehicle-rated system, states how capacity was checked and includes the paving and outlet work needed to make the drain function.